

Everyone
loves order, some more than others. And there is nothing more frustrating than
opening up a Revit file and the Project browser is a complete riot. Some of you
will have this skill down to a tee, but a lot of people have no idea about this
little gem.
Proper
browser organisation is a great skill to have, especially when collaborating.
It is something your colleagues will love you for. I know I personally can’t be
happier when I open up a Revit file and the browser is easy to understand and
logically sorted/grouped.
In this Tips
& Tricks we will take you through the process of creating your own “rule”
for organising the project browser into “Type” then by “Scale”. But any setting
can be used, you decide. This can be done at any stage in your projects life,
but it is recommended to have this set-up in your works template.
 Step 1: With your project open go to the
“View” tab" > “Windows” panel > “User interface drop-down >
“Browser Organisation”
Step 1: With your project open go to the
“View” tab" > “Windows” panel > “User interface drop-down >
“Browser Organisation”
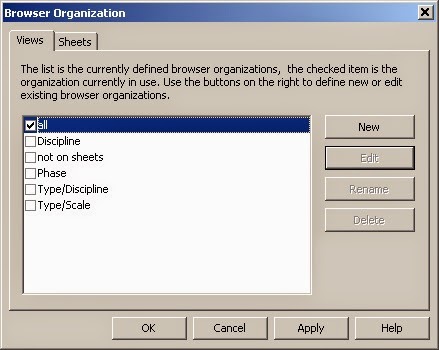
This will
open a dialog box called “Browser Organisation” see image:
There are a
few default “rules” for laying out your browser, feel free to use one if it
suits. We will be creating a new “Rule”. So, select “NEW”
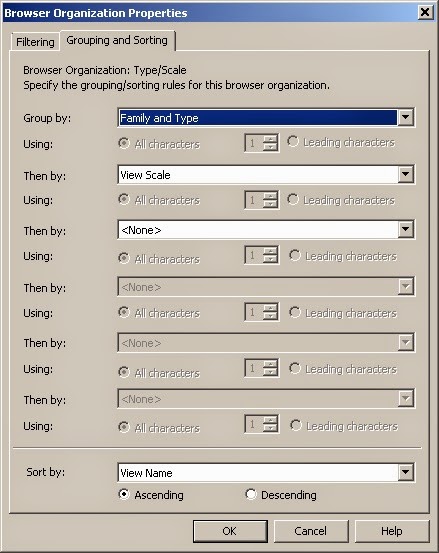 Step 2: Name
the new rule as you see fit, click okay, this will open another dialogue box
called “Browser Organisation Properties”. You may apply a filter to your
browser (say, if you didn't want to see any Mechanical discipline views) but we
are not in this case.
Step 2: Name
the new rule as you see fit, click okay, this will open another dialogue box
called “Browser Organisation Properties”. You may apply a filter to your
browser (say, if you didn't want to see any Mechanical discipline views) but we
are not in this case.
From the “sorting
and Grouping” tab, we want to firstly
group by “Family and Type” to keep the views grouped by Floor plan, Elevation, Section etc.,
and then by “View Scale”. Click OK
 Step 3: OPTIONAL - If you want, you may also organise
your Sheets, from the “sheets” tab in the browser oragnisation box (see image
below)
Step 3: OPTIONAL - If you want, you may also organise
your Sheets, from the “sheets” tab in the browser oragnisation box (see image
below)In here, we have used the default “Sheet prefix” option, but edited it to group the sheets by the LEADING 2 CHARACTERS. Because the naming method used in this project (A1-01, A3-01, A3-02 etc.) This works very well, this will group all my sheets into paper size. Which makes navigation much easier.
Click OK and your browser should
now be organised and grouped according to your specifications. And it is as
easy as that.
Before: After:


We hope you found this tips & trick article
helpful
Happy
Modelling
TMS Autodesk Team

No comments:
Post a Comment