
Creating a solar study is a huge advantage that Revit has over many other software’s, but it
is not something everyone knows how to do.
It is a very fast and easy process. First thing you will need to do is decide on what view you
would like to run the solar study on. Be it your Site plan, elevations, default 3D view or an
internal camera view, the process is the same. One you have the view you want, you will
need to configure the sun settings. Select the Sun path button on the view control bar along
the bottom of the drawing window and select “Sun settings”, this will open up the sun
settings dialogue box. Depending on what type of solar study you want depends on what
options you choose here:
Single Day
1. Choose the option for single day
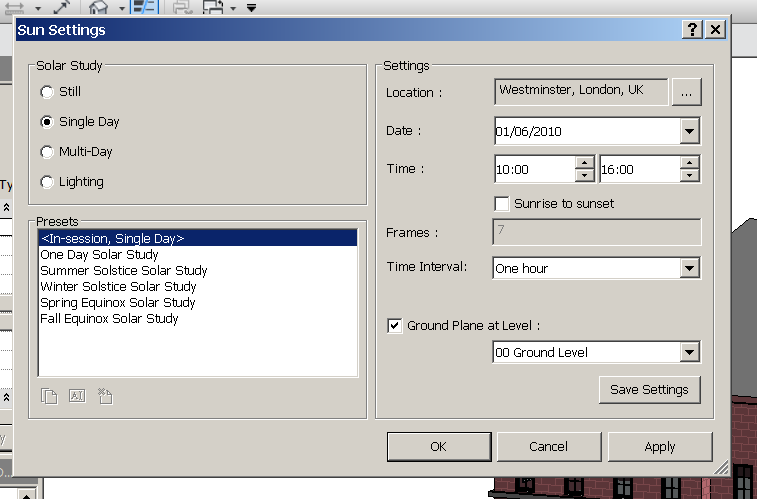 2. Set the date, then specify what time you want to see the solar study from/to, or you can tick the box that says “from sunrise to sunset”
3. Choose the time intervals you wish (15mins/30mins/45mins/1hour)
4. Set your Ground plane level
5. Save the set-up if you like, for future use click save settings and give the set-up a name.
6. Click apply and OK
Multi-day
1. Choose the option for Multi-Day

2. Choose the date you want the solar study to run from and to
3. Set the from and to time
4. Choose whether you want it to analyse hourly, daily, weekly or monthly (depending on the length of time you have set this up for, some of these settings might not be relevant, for example, I would not recommend setting it to hourly if you have a 1 year time scale, this will take a very long time to run through a single cycle)
5. Save the set-up if you wish
6. Click apply and OK
 Now, click on the Sun path icon again in the view control bar and there will be an option to “Preview solar study”, select this. In the options bar at the top of the drawing window there will be a selection of video buttons that become available, if you select the play button, it will play your solar study from start to finish. You can go back into the sun settings to change the time or date to whatever you wish to see the different results. Keep in mind that solar studies are view specific so will only be available in the view you set it up in. You can export the solar study out of Revit as an .AVI file. To do this, make sure you are in the view you set up for the solar study and follow these steps:
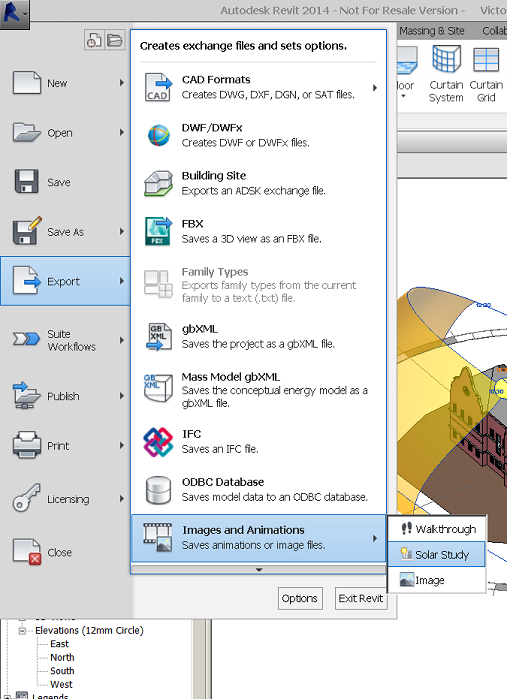
1. Go to the applications menu > Export > Images & animations
2. Select Solar study, a dialogue box will open
3. You can change the settings here if you wish
4. Choose the location to save the file
5. Select the compressor and click OK
Depending how long the solar study goes on for will depend how long it takes to export the file out. Once it has finished, you will have an .AVI file you can share out to whoever needs it.
We hope you found this Tips & Tricks helpful.
Happy Modelling
TMS Autodesk Team
For more information about Autodesk products, training or support please visit TMS website

For more information about Autodesk products, training or support please visit TMS website
No comments:
Post a Comment